 |
 |
 |
 |
 |
|
In this tutorial I will show you a technique to make a really cool an realistic rusty text effect in photoshop. The lack of good tutorials about this particular effect is the main reason why I wrote it. For this effect I’ll use real rust textures because that effect is hard to reproduce in photoshop and it makes no sense to reproduce it if you have real textures. The important part is not the texture itself but the 3D look, lighting and blending modes used to achieve the final effect. I’ll give you everything you need for this tutorial, including the font used, the textures and the PSD file. In this case the PSD file is a wallpaper where I used this effect to give you an example of where you could use it. Final result preview
Text font, rust texture 1, rust texture 2 So I’ll go straight to the effect although I already have a grungy background ready. You can see how I made it if you download the psd file but let’s go to the rusty effect part now. Video demonstrationType you text using the Mephisto font that I provided you or other font if you want but you should use a bold one because this effect looks better on bold fonts. I typed the name of a fictional monster. The text size I used is 50px.
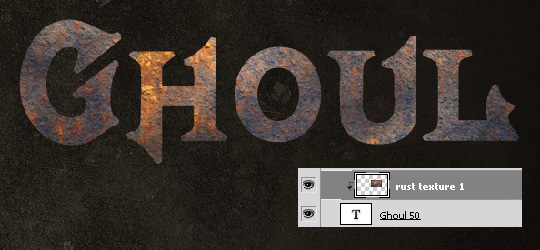
Open “rust texture 1″, scale it down to fit the text’s width and paste it as Clipping Mask.
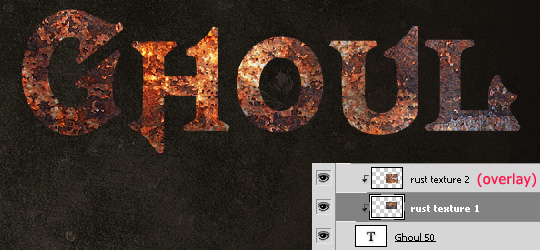
Open “rust texture 2″, scale it down and paste it above the other one also as clipping mask. Apply an Unsharp Mask Filter by going to Filter>Sharpen>Unsharp Mask. Use Amount 250 and Radius 0,4. Apply this filter to both textures.
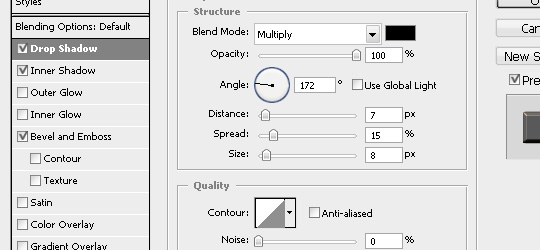
Now, this already looks rusty to me but we can make it look so much better… Double click the text layer on the Layers Palette to open the Layer Style window and apply the following effects: Drop Shadow
Now it looks a lot better with the 3D effect. At this point you could leave it as it is if you like it but I also added edges because I like it more with edges, like in the image below.
In order to make the edges like in the image above, Ctrl+Click the thumbnail of the text layer on the Layers Palette to select the edges of your text.
When you have the selection around the text, create a new layer above the text and his two clipping mask texture and go to Edit>Stroke. Set Location to Outside and Width 2 – 3 pixels depending on the size of you text and the spaces between the letters.
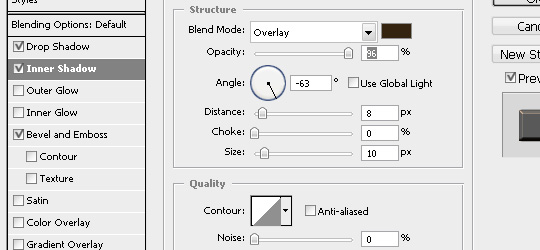
We are going to use the same steps as for the text to add the “rust texture 2″ as clipping mask on this stroke so you can duplicate the layer with “texture 2″ that you used on the text and paste it here as clipping mask and set Blending Mode to Normal. The edges look to sharp and flatten so lets make them a bit more 3D too. Open the Layer Styles window for the stroke layer and apply this settings: Inner Shadow
Well, that’s all it is to it, not extremely difficult, but definitely a real rusty look. Below you have the final result. 
|