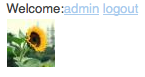
前几天碰到一个制作用户头像的东西,也就是当用户登录后需要打印其头像,如下图所示8 r0 T, W- I0 w# i# Q' N' j! Y1 a4 V
虽然在drupal6中做过类似的东西,但是换到drupal7中就不会有效果了,几经寻找,今天终于给弄出来了。稍做整理后放上来跟大家一起共享。
# n% E5 i& {: s首先来看看其在drupal6的实现方法,主要分两大步,第一就是在template.php中修改1 T0 E, |- u/ K
function yourthemename_preprocess_page(&$vars) { //code}4 u+ {) V" j) b" d# {# }
我们在上面这个函数加入下面的代码:
& O/ t" ?- ^% F2 C0 R* D7 zfunction yourthemename_preprocess_page(&$vars) {if ($user->uid > 0) { $vars['user_name'] = $user->name; $profile = content_profile_load('profile', $user->uid); $picture_path = $profile->field_user_picture[0]['filepath']; if (empty($picture_path)) { $fields = content_fields('field_user_picture'); $picture_path = $fields['widget']['default_image']['filepath']; } $vars['user_picture'] = l(theme('imagecache', 'user32x32', $picture_path), "user/{$user->uid}", array('html'=>true)); }}
3 x: V; u- O0 ]! H然后我们需要在page.tpl.php中调出用户头像0 U* N9 m( l1 v/ k! n5 _/ n
<?php print $user_picture; ?>7 I1 U7 Z; N! \% |% E! W+ I- V
上面我简单的列出在drupal6中的实现的方法,了解一下后,我们进入今天的主题,看看在drupal7中如何制作出上图的效果。实质上是没有多大的区别,只是在drupal7中调用文件的路径和方式已改变,另外还有一点就是为了不影响别的地方用户头像大小,我们在这里写死了一个image style样式,这样一来,我们就需要先创建一个image style。具体创建image style的详细方法,我在《Drupal7基础教程--用户(三)》有介绍过,感兴趣的朋友可以进去看看,在这我只是简单的说一下,在地址栏中直接输入"admin/config/media/image-styles/add",你会进入到下图的页面位置:
, O+ K; [( h! `1 ^1 ^1 g在“style name”中输入您想设置的名字,这里设置的是userheader,点create new style你就可以创建一个image style的样式。创建好样式后,我们后面的工作和在drupal6下基本上是一样的,首先在template.php中加入下面的代码:
/ T/ U7 C: C l5 z0 sfunction html5_preprocess_page(&$variables) { // Get user add user picture global $user; if ($user->uid > 0) { $user_info = user_view($user); $variables['user_name'] = $user->name; //设置用户名 $filepath = $user->picture->uri; //设置用户头像路径 $style = 'userheader'; //设置用户头像样式,这里需要跟刚才创建的image style名一致 if (module_exists('image') && file_valid_uri($filepath)) { $variables['user_picture'] = theme('image_style', array('style_name' => $style, 'path' => $filepath, )); } else { $variables['user_picture'] = theme('image', array('path' => $filepath, )); } } }
7 N' M6 s: i, E5 R- s+ s* @ F) j现在就是最后一步了,在page.tpl.php中打印出用户头像就可以了:
w% p# p3 e; O/ g0 l5 {<?php print $user_picture; ?> M: E+ J7 C' i: ]# G L7 c/ h+ c4 m
我们这个例子不单打印用户头像,还 创建了两个链接,现在一起贴上来给大家参考:
0 Z9 r/ T" H) }/ V3 {- s* g4 W* O<?php if($user->uid): ?> <aside class="login-bar c4"> <span>Welcome:<?php print l($user->name,'user/'.$user->uid); ?></span> <?php print l("logout","user/logout"); ?> <p><?php print $user_picture; ?></p> </aside> <?php else: ?> <aside class="login-bar c4"> <?php print l("Login","user/login"); ?> | <?php print l("Singup","user/register"); ?> </aside><?php endif; ?> H6 _4 X5 K+ u. Y
其实这一部分内容实现方法,大家还可以参考前面有一篇《玩转Drupal7的User Login》,这样你对这一部分内容就更了解了。大家保存并清除缓存,重新刷新页面就可以看到开文图片所示的效果了。; o, N3 L. x6 k- g! P
另外还有一种方法就是使用views来创建,如下所示1 o5 {; n4 E/ K3 P4 s( _7 u
不过用views所创建有一个不太好的地方就是需要在用户头像那里先设置好头像的image style,换句话说就是不能按照不同地方放置不同的image style。所以我个人还是偏向于第一种方法。接着把views创建出来的block放到相应的位置就OK了。这样我们如何设置用户头像就介绍完了,如果大家有更好的方法,可以一起探讨学习。; X0 t! K- J5 t: s
如需转载请注明出处:W3CPLUS
( y; P( [! \7 W7 [7 |1 o: m% i1 }
9 R( f: E, m: m8 r( q% H$ W- L* U0 s' K' R6 Z
: k5 D5 B. k) r# u! ^9 @
2 p2 B9 \3 B' e9 ? |
|

 发表于 10-13-2011 02:39